Entra (Azure AD) Connect - Install
DISCLAIMER: The information in this guide is provided "as is" without any guarantee of completeness, accuracy, timeliness, or of the results obtained from the use of this information. The author assumes no responsibility for any errors or omissions in the content. It is meant for general information purposes only and should not be used as a substitute for professional advice. The author is not responsible for any damages caused by the use of this information. By using this guide, you agree to hold the author harmless from any and all claims, damages, or expenses that may arise from your use of the information.
Introduction
Although it is possible to install Entra Connect on the domain controller, Microsoft advises against it. Instead, it is preferable to install Entra Connect on a separate domain-joined Windows Server. For the purpose of this demonstration, however, we will proceed with the installation on the domain controller. Always avoid installing additional software or roles on a Domain Controller.
In this guide, the term Azure AD and Entra ID are used interchangeably.
Integrating on-premises directories with Azure Active Directory (Entra ID) seamlessly connects and manages user identities in a cloud-based environment, enhancing both security and accessibility. Entra Connect is the bridge that facilitates this integration, synchronizing identity data between your on-premises environment and Entra ID.
Requirements
- Prerequisites for Microsoft Entra Connect
- Entra ID Global Administrator credentials
- Domain Enterprise Admin credentials
Installation/Configuration
- Download Azure AD Connect.
Microsoft maintains a changelog for Entra Connect. It is recommended to regularly update Entra Connect to the latest version. Review the changelog to discover the latest features and bug fixes.
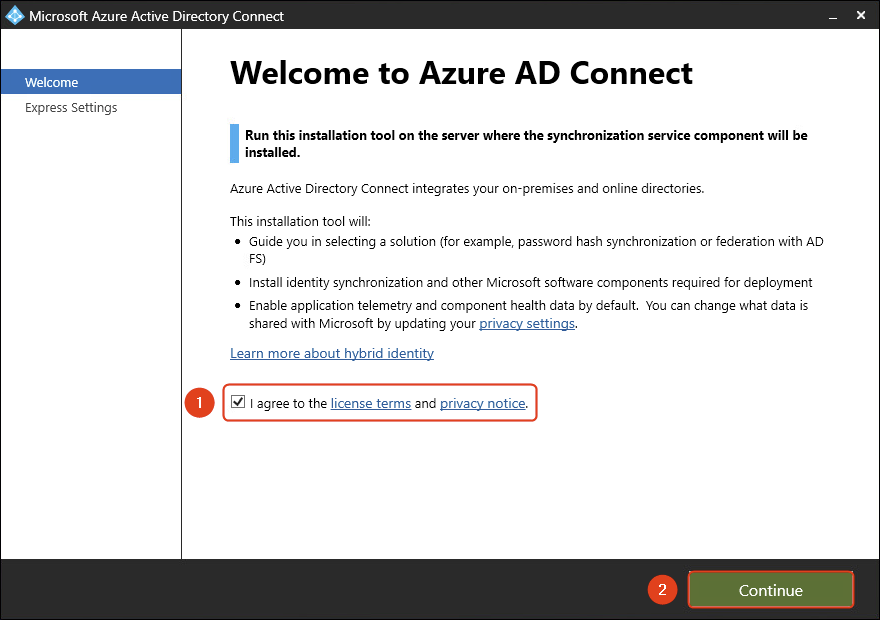
- After downloading Azure AD Connect, run the setup. Agree to the license terms and click Continue.
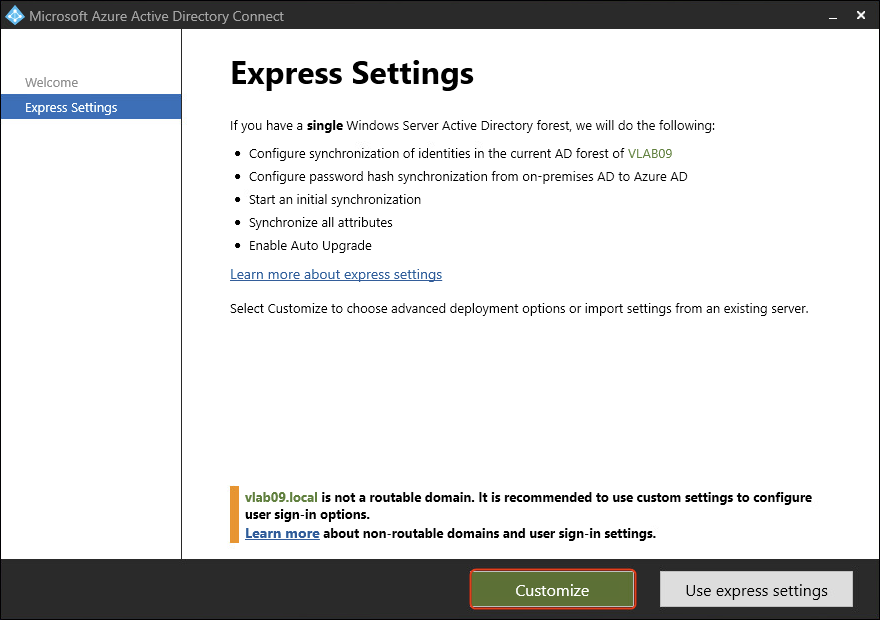
- Click Customize for a custom installation, allowing review and selection of available options.

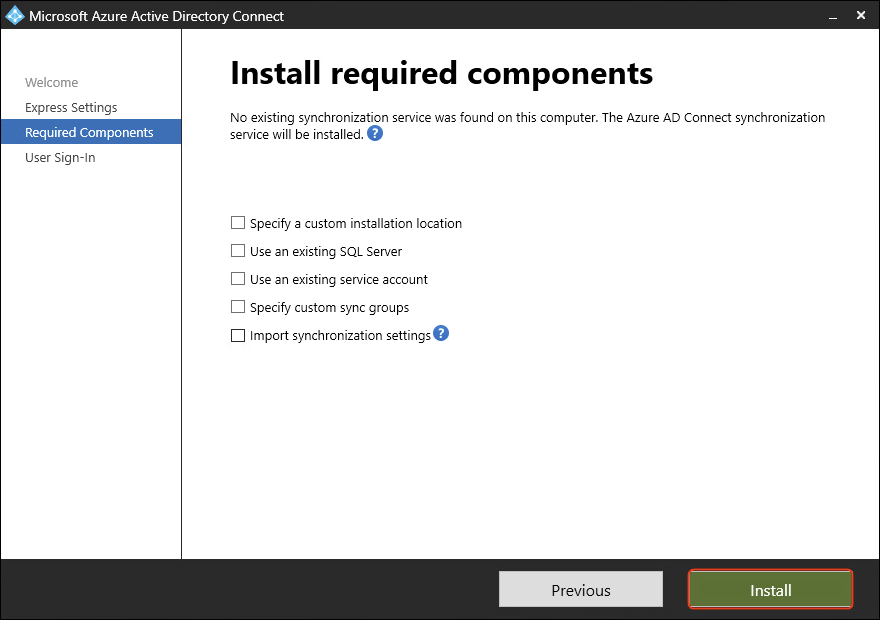
- Click Install to begin the Entra Connect synchronization service installation.

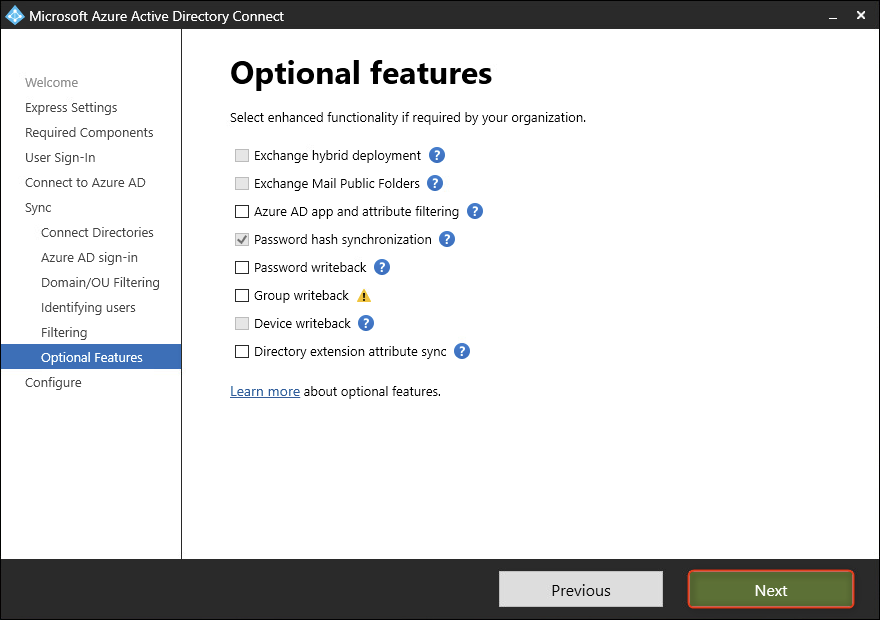
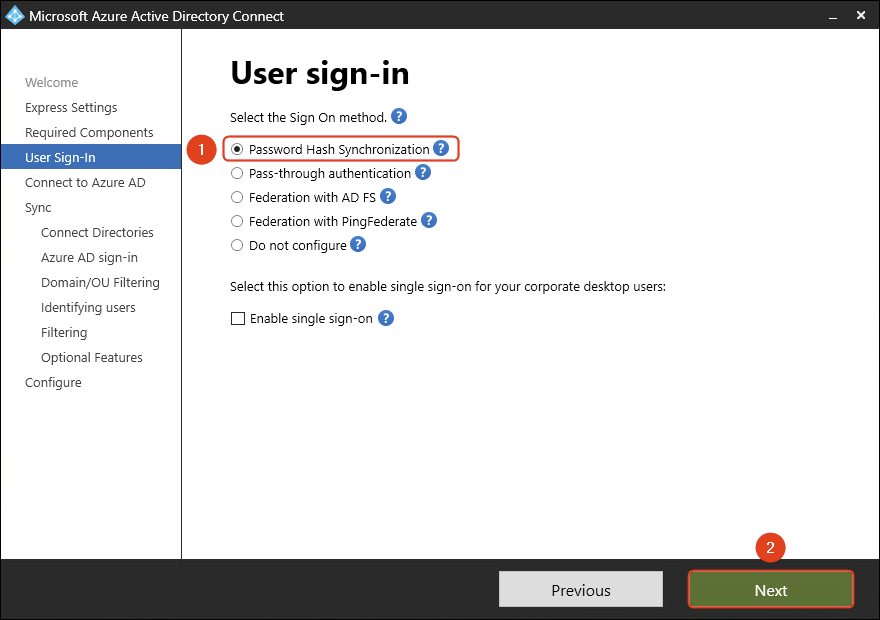
- Select Password Hash Synchronization.

Do you want to Enable single sign-on? Read the article Configure Azure Active Directory Single Sign-On (SSO). You can skip this and enable it later.
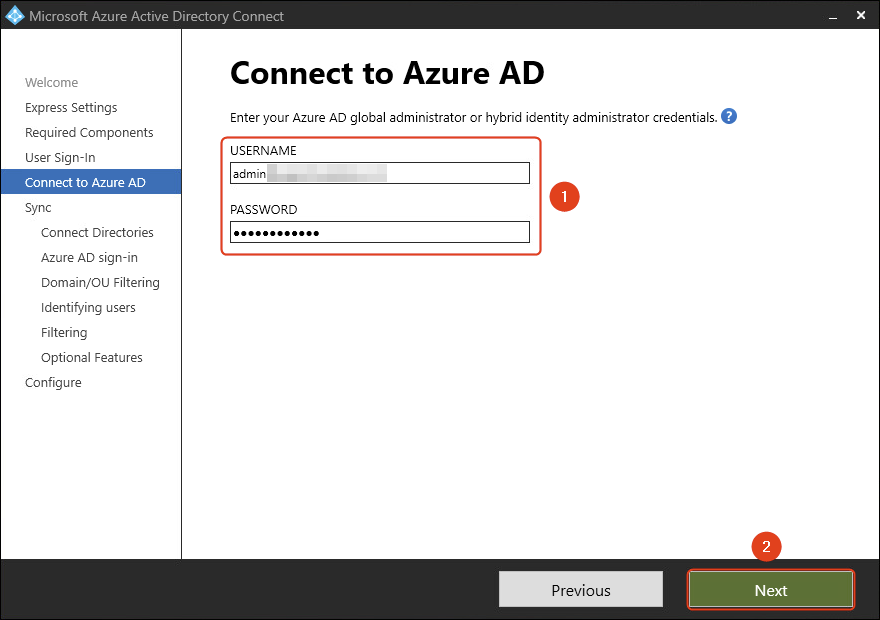
- Enter the Entra ID global administrator credentials. Click Next.
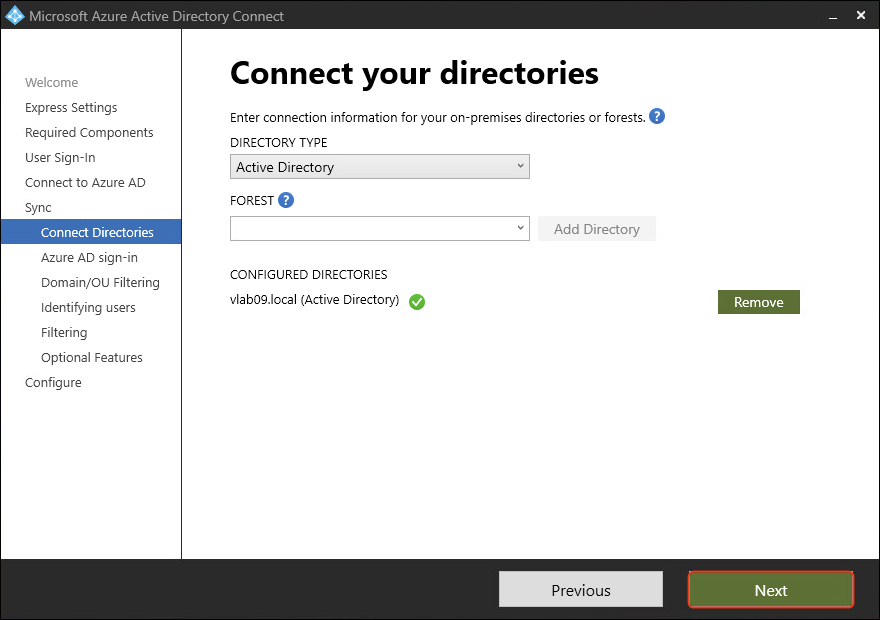
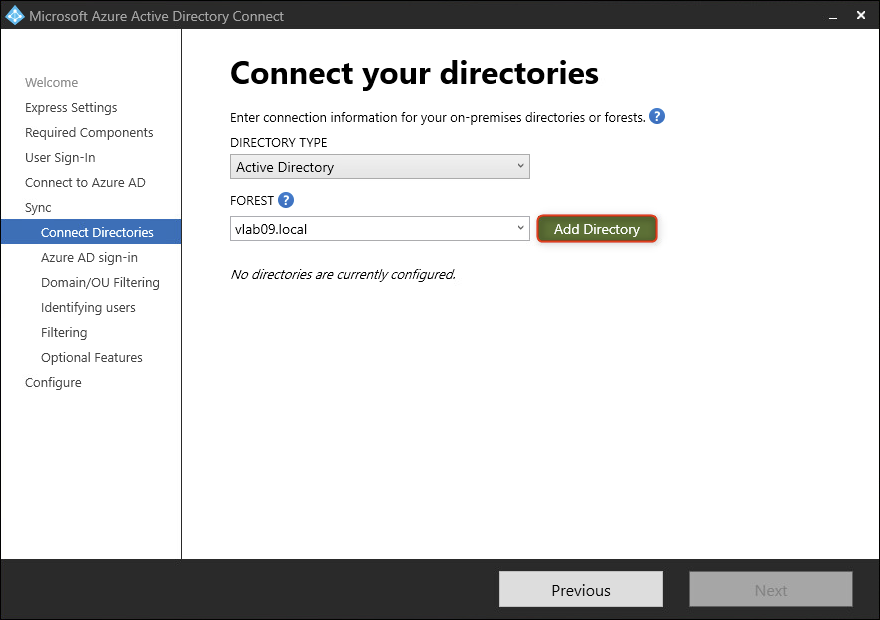
- Click Add Directory.

- Select Create new AD account. Enter an administrator account with Enterprise Admin rights. Click OK.
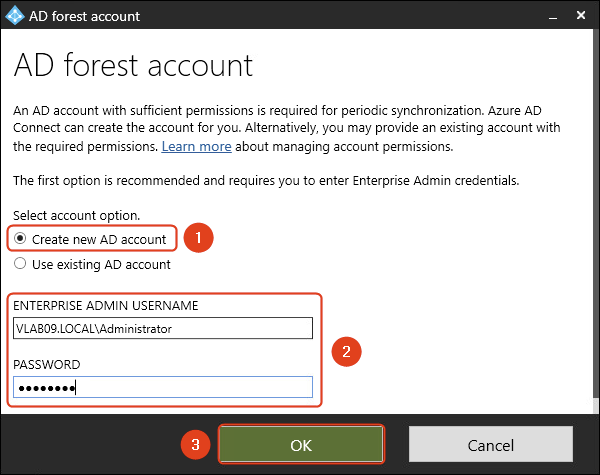
You can select the option Use existing AD account and type the AD account credentials you created. Read more on how to create an AD DS Connector account.
- The Active Directory is added. Click Next.
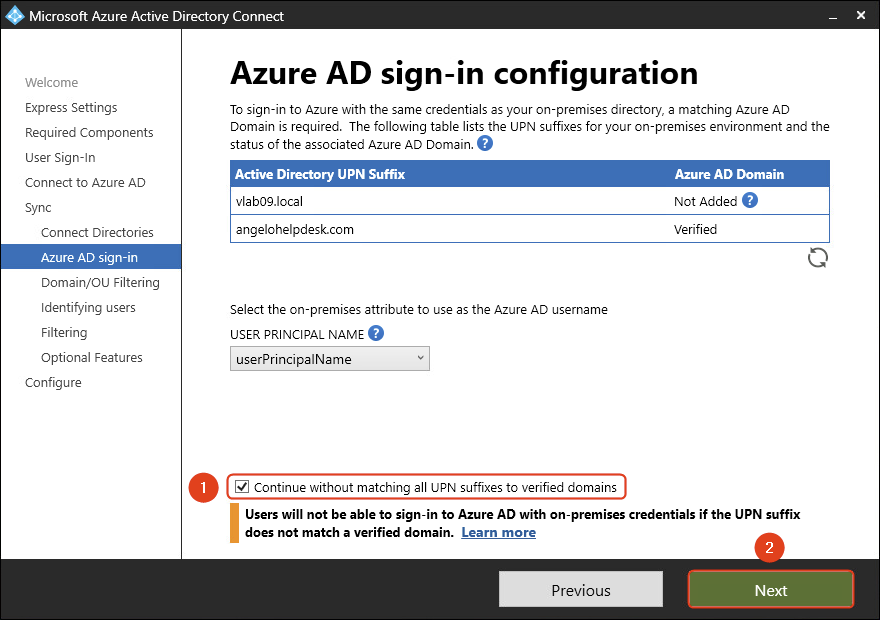
- Select Continue without matching all UPN suffixes to verified domains. Click Next.

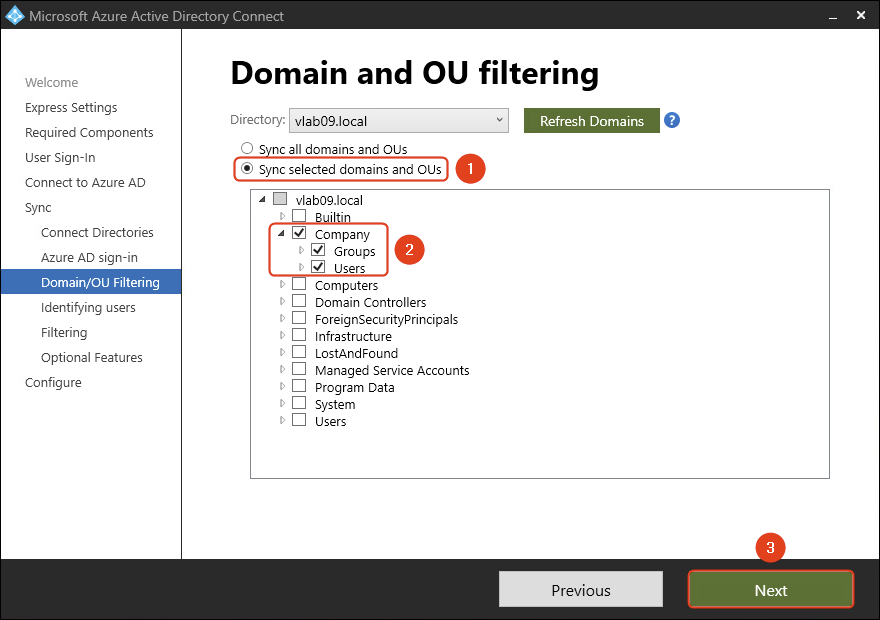
- Select Sync all domains and OUs. Click Next.
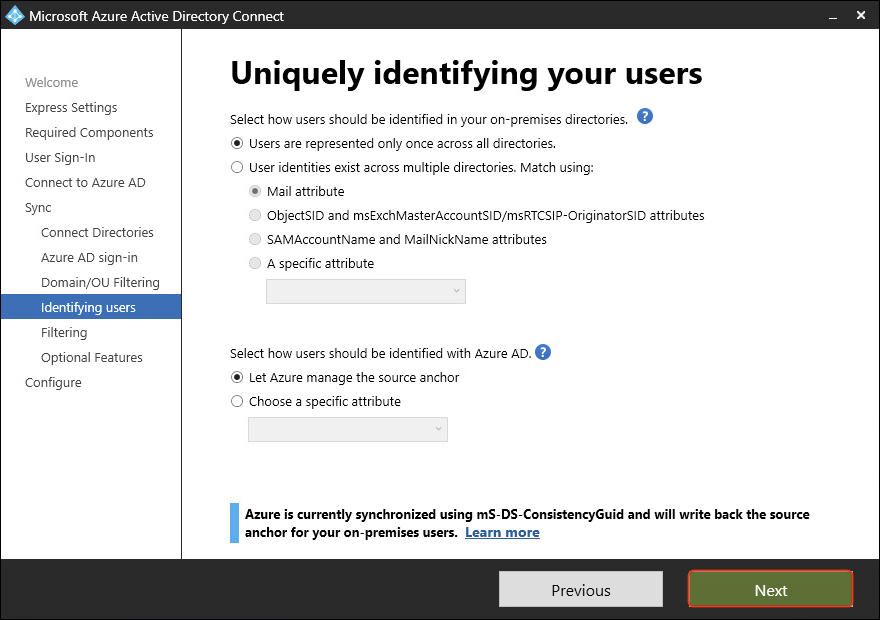
- Select how users should be identified in the on-premises directories and select how users should be identified with Azure AD. In this guide, the default settings will be used. Click Next.

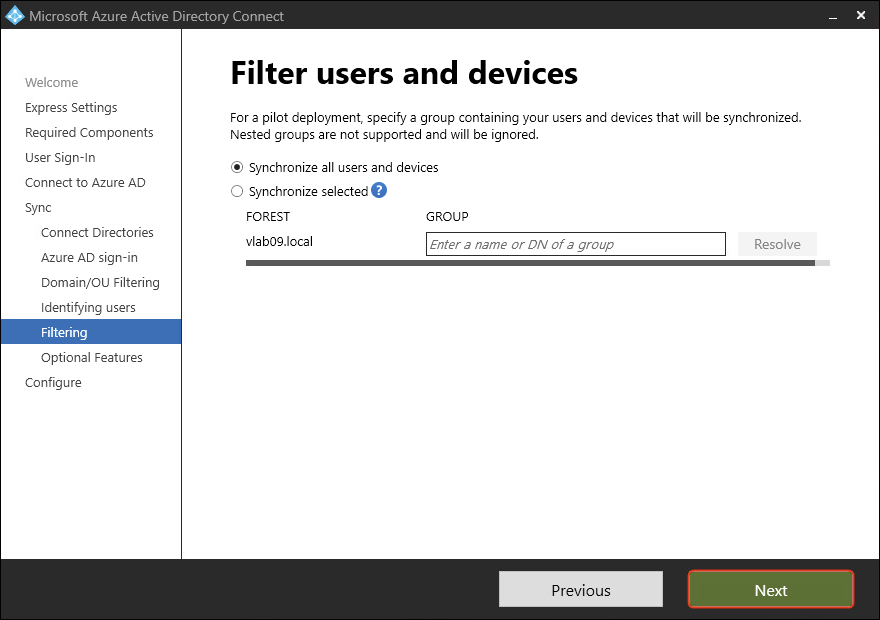
- Select Synchronize all users and devices. Click Next.
- In this guide, the default settings will be used. Click Next.
- Check Start the synchronization process when configuration completes. Click Install.
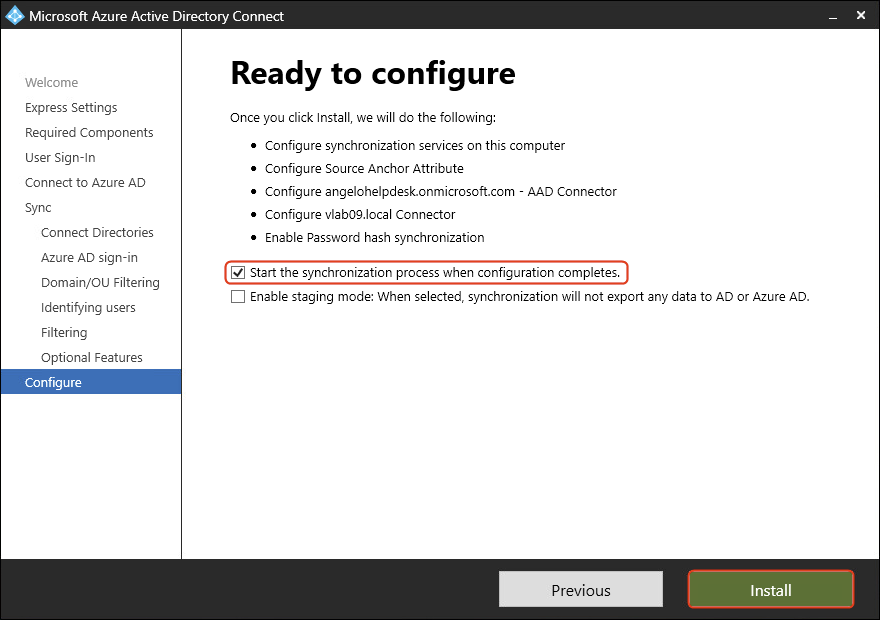
- Entra Connect configuration completed. Click Exit.


Post Installation/Configuration
Verify Synchronization
Via Microsoft 365 Admin Center
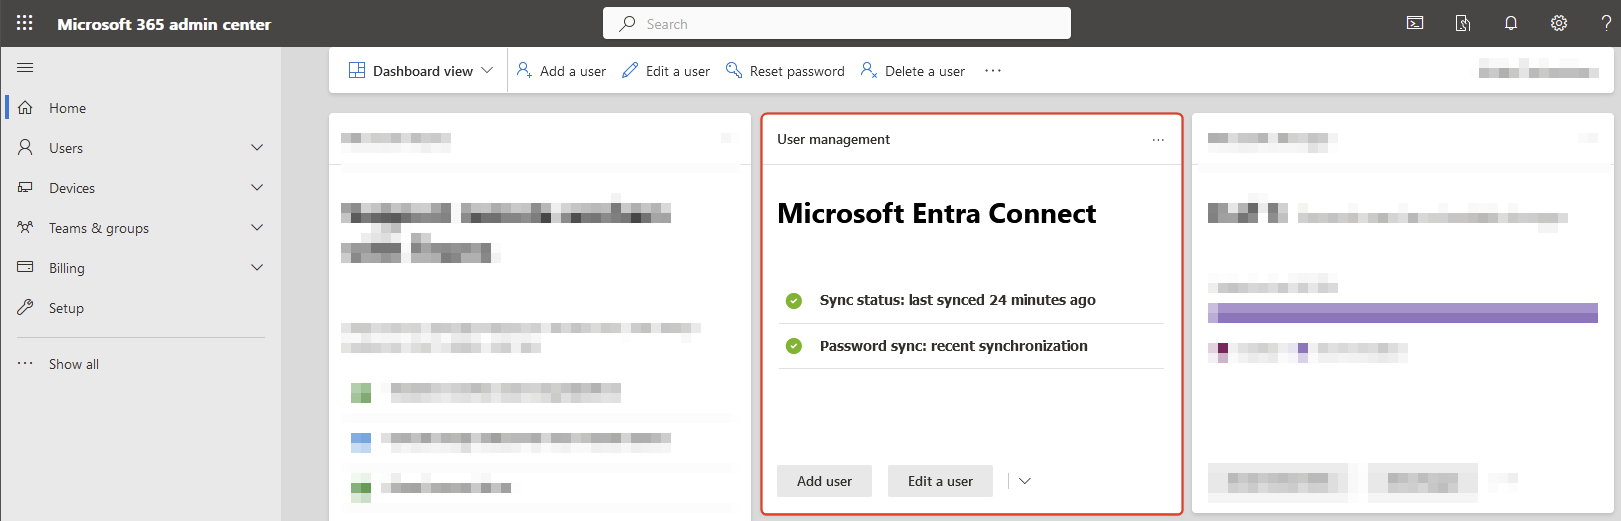
Sign in to the Microsoft 365 admin center.
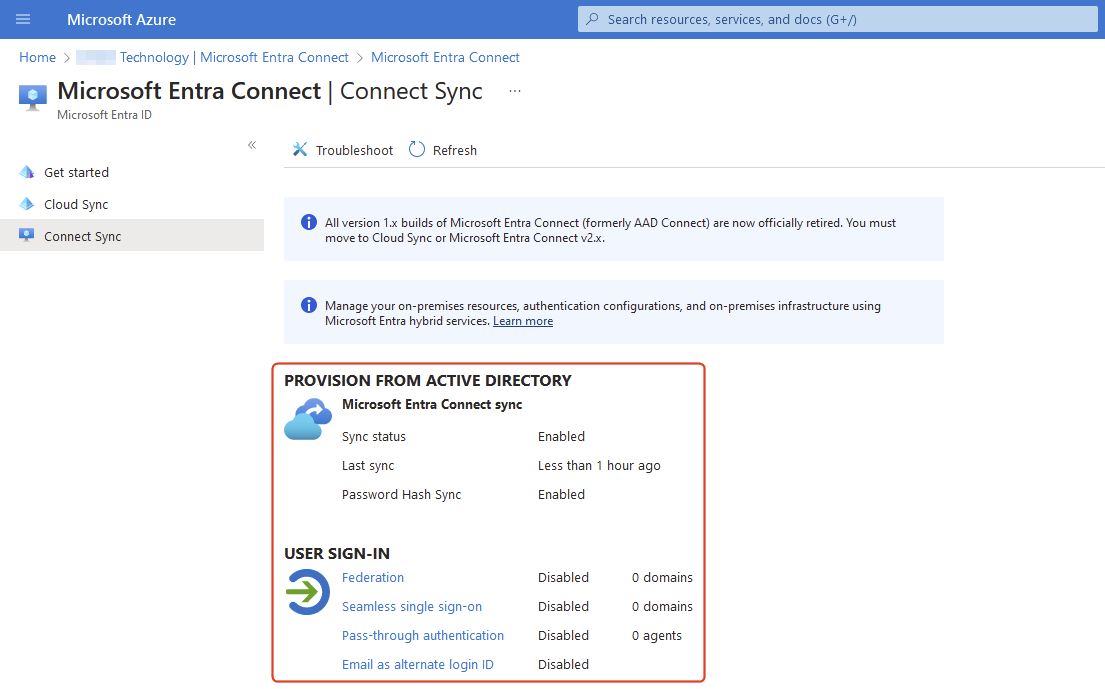
The Microsoft Entra Connect sync status will be available on the dashboard.
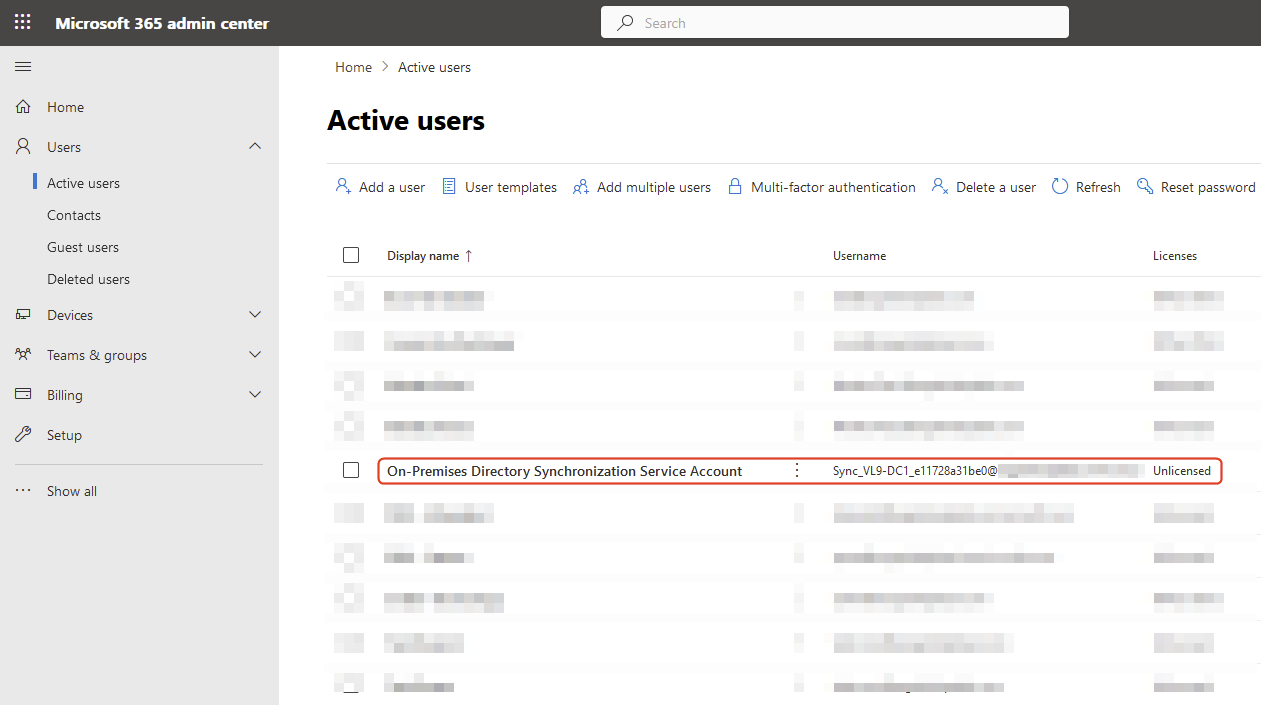
Verify that a new user is displayed. That’s the Entra ID connector account created by Entra ID Connect setup, which will sync AD objects between on-premises AD and Entra ID.
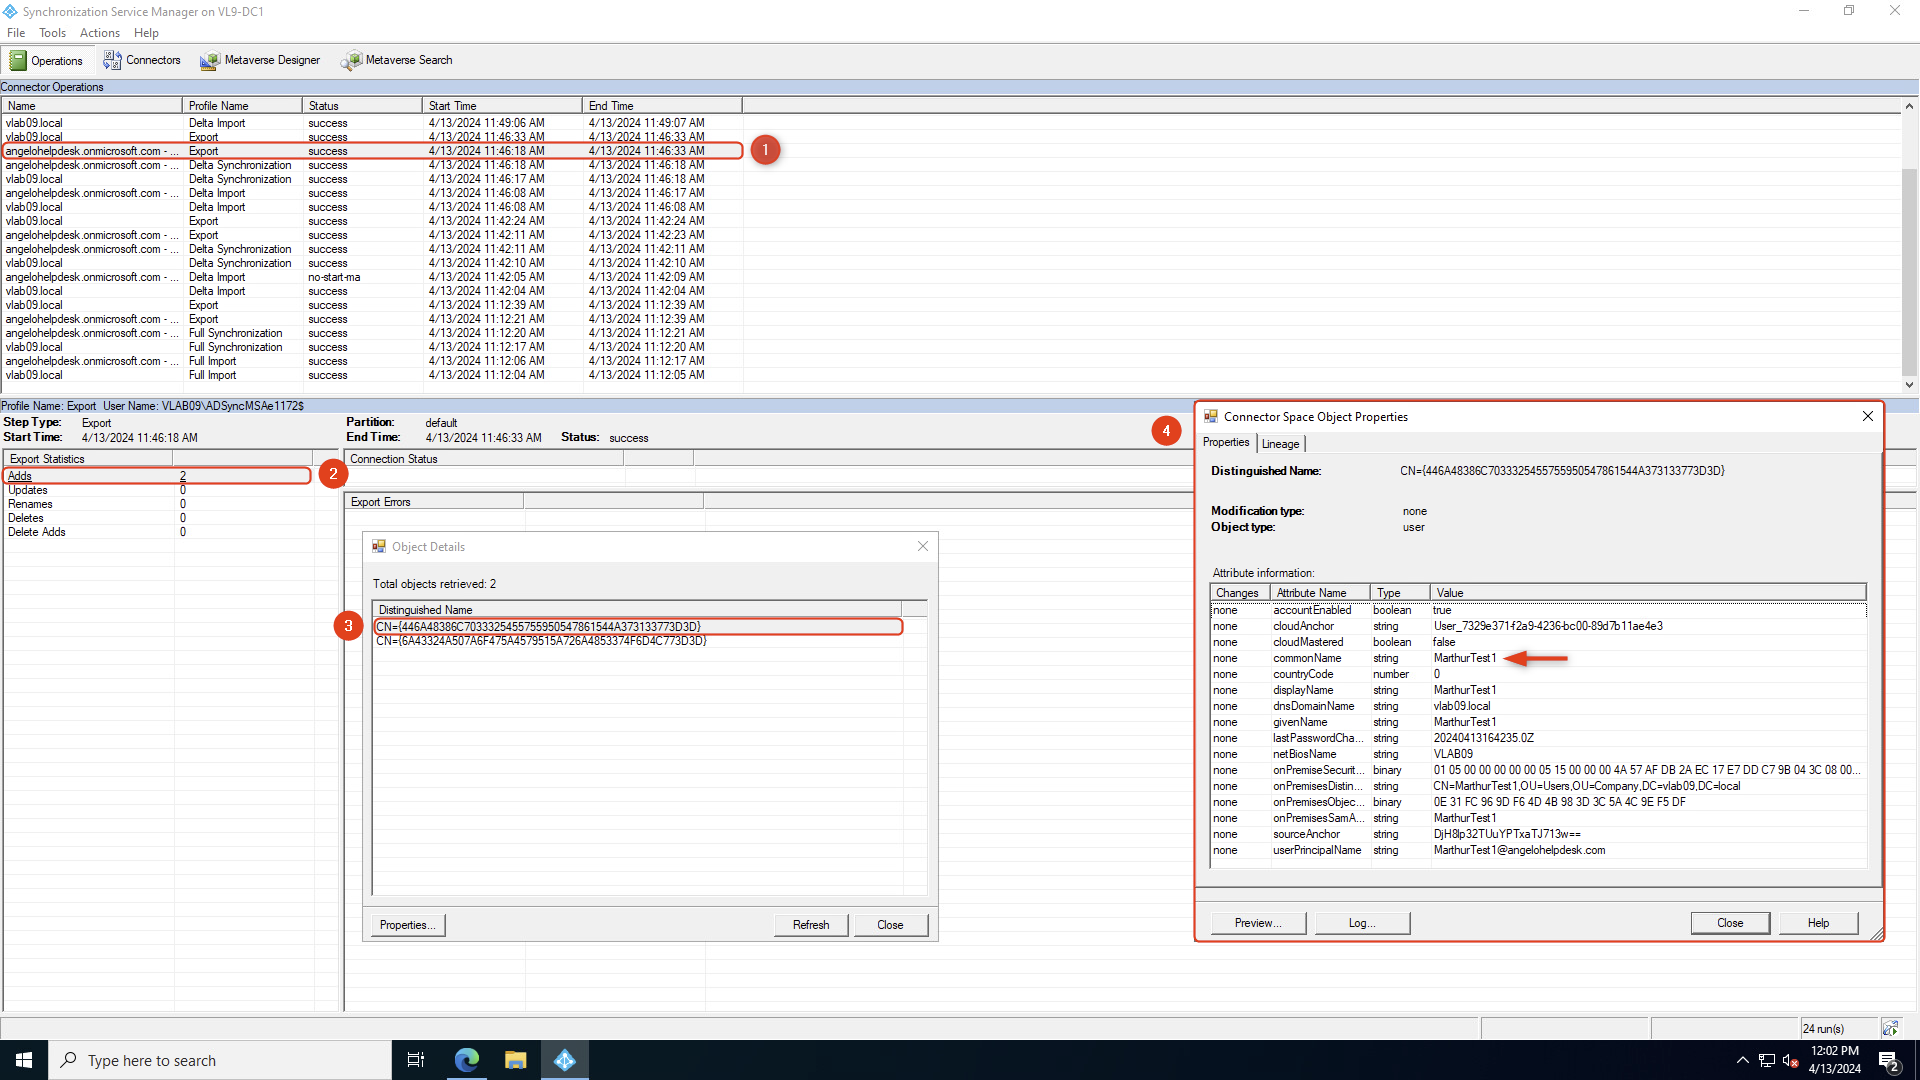
Afterwards, On the Windows Server, click the Start menu, search and run the Synchronization Service utility.
In the Synchronization Utility, click on the domain.onmicrosoft.com with the profile name Export. Click on Adds in the Export Statistics window. These objects are exported with success from on-premises AD to Entra ID. Double-click on each Distinguided Name to identify the user object.
Refresh the Microsoft 365 admin center and verify the users:

Via Azure Portal
Sign in to the Azure Portal.
Seamless Single Sign-On Deployment
Pending
Sources
KB Change/Issue Log
yyyy/mm/dd - Title
Issue
N/A
Solution
N/A
Sources
- N/A
KB Meta
| Page Includes | @9#bkmrk-callout-danger-NoResponsibilityDisclaimer-5wod5ufe |