Adobe Acrobat Deployment (Terminal Server)
DISCLAIMER: The information in this guide is provided "as is" without any guarantee of completeness, accuracy, timeliness, or of the results obtained from the use of this information. The author assumes no responsibility for any errors or omissions in the content. It is meant for general information purposes only and should not be used as a substitute for professional advice. The author is not responsible for any damages caused by the use of this information. By using this guide, you agree to hold the author harmless from any and all claims, damages, or expenses that may arise from your use of the information.
Introduction
The Adobe Acrobat Deployment will used Adobe's Named User Licensing (NUL) method. NUL is the preferred activation method.
DC products support NUL and user management via the Admin Console. The Console supports managing single user and group entitlements for all Adobe products as well as Single Sign-On. It also provides tools for managing software, users, and devices and support multiple ID types. With NUL, end users simply “activate” Acrobat by logging in to any VM or machine. License-related data is saved in the
<user>/AppData/Roaming/Adobe/folder which is synced to the VM on login.
Requirements
- Verify if Acobe Acrobat 32-bit or 64-bit is required.
- Download the Adobe Acrobat Installer.
- A functional Terminal Server (Session Host).
Optional Resources
- Download Adobe Acrobat Customization Wizard.
- Installer Table Modifications
Instructions
The following instructions apply to terminal server (session host) deployments. Commands are to be executed on the terminal server.
- (Optional) Customize the installer with the Customization Wizard.
- Run command:
Change User /Install - Run command:
Setup.exe /sALL /msi ROAMIDENTITY=1 ROAMLICENSING=1/sAll= Run installer in silent mode./sPB= Silent mode with minimum UI: show the progress bar only. - Run command:
Change User /Execute - Verify the following registry keys are present and the string
(REG_SZ)values are 1 on the master image. If not, create the key and set the value as 1.
[HKEY_LOCAL_MACHINE\SOFTWARE\Adobe\Licensing\UserSpecificLicensing]"Enabled"="1" (REG_SZ)
[HKEY_LOCAL_MACHINE\SOFTWARE\Adobe\Identity\UserSpecificIdentity]"Enabled"="1" (REG_SZ)
Gotchas/Nuances
Launch Adobe Acrobat for Third-Party Print-to-PDF Functionality
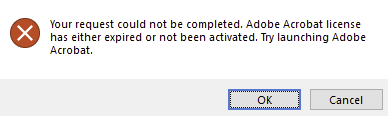
Users must launch Acrobat prior to using “Print to PDF”, the Microsoft Office Acrobat plugin, or any other PDF Maker features.
Install Print to PDF Printer Driver
Print to PDF printer drivers may require enabling Windows test signing before they can be installed, because the drivers may not be signed. Enable Windows test signing, restart Windows and install Print to PDF printer driver. Afterwards, disable Windows test signing and restart Windows.
- Enable Windows test signing:
bcdedit /set testsigning on - Restart Windows.
- Install Print to PDF printer driver.
- Disable Windows test signing:
bcdedit /set testsigning off - Restart Windows.
Sources
- adobe.com - Adobe Named User Licensing (NUL)
- adobe.com - Adobe Acrobat Download
- adobe.com - Adobe Acrobat Customization Wizard Download
- adobe.com - Adobe Acrobat Customization Wizard - Installer Table Modification
KB Change/Issue Log
yyyy/mm/dd - Title
Issue
N/A
Solution
N/A
KB Meta
| Page Includes | @9#bkmrk-callout-danger-NoResponsibilityDisclaimer-5wod5ufe |