DoD STIGs Implementation and Deployment
DISCLAIMER: The information in this guide is provided "as is" without any guarantee of completeness, accuracy, timeliness, or of the results obtained from the use of this information. The author assumes no responsibility for any errors or omissions in the content. It is meant for general information purposes only and should not be used as a substitute for professional advice. The author is not responsible for any damages caused by the use of this information. By using this guide, you agree to hold the author harmless from any and all claims, damages, or expenses that may arise from your use of the information.
Introduction
Group Policy Objects (GPOs) provides an infrastructure for centralized configuration management of the Windows operating system and applications that run on the operating system. GPOs are a collection of settings that define what a system will look like and how it will behave for a defined group of computers or users. GPOs are used within Active Directory to configure systems in accordance with Security Technical Implementation Guides (STIGs). Benefits of using GPOs are time and cost saving, centralized location for all configurations, increased productivity, enhanced security and standardization.
This package is to be used to assist administrators implementing STIG settings within their environment. The administrator must fully test GPOs in test environments prior to live production deployments. The GPOs provided contain most applicable GPO STIG settings contained in STIG files.
This package contains ADMX template files, GPO backup exports, GPO reports, and WMI filter exports and STIG Checklist files. It is to provide enterprise administrators the supporting GPOs and related files to aid them in the deployment of GPOs within their enterprise to meet STIG requirements. See the ReadMe.txt file for additional information.
It must be noted that the Group Policy Objects (GPO) provided should be evaluated in a local, representative test environment before implementation within production environments. The extensive variety of environments makes it impossible to test these GPOs for all potential enterprise Active Directory and software configurations. For most environments, failure to test before implementation may lead to a loss of required functionality.
It is especially important to fully test with all GPOs against all Windows Operating Systems, internet browsers, specific and legacy applications which are targeted by each STIG GPO which are currently used in the environment.
SOURCE: https://public.cyber.mil/stigs/gpo/
Requirements
- A functioning Domain Controller
- A functioning Domain
Instructions
Download DoD STIGs GPO
- Download the latest DoD STIGs GPO (https://public.cyber.mil/stigs/gpo/). Use the download link at the bottom of the page. The GPOs and related files should be contained within a single zip file.
- Extract the contents of the zip file.
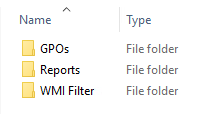
- Review the extracted contents. The contents should look similar to the following screenshot:
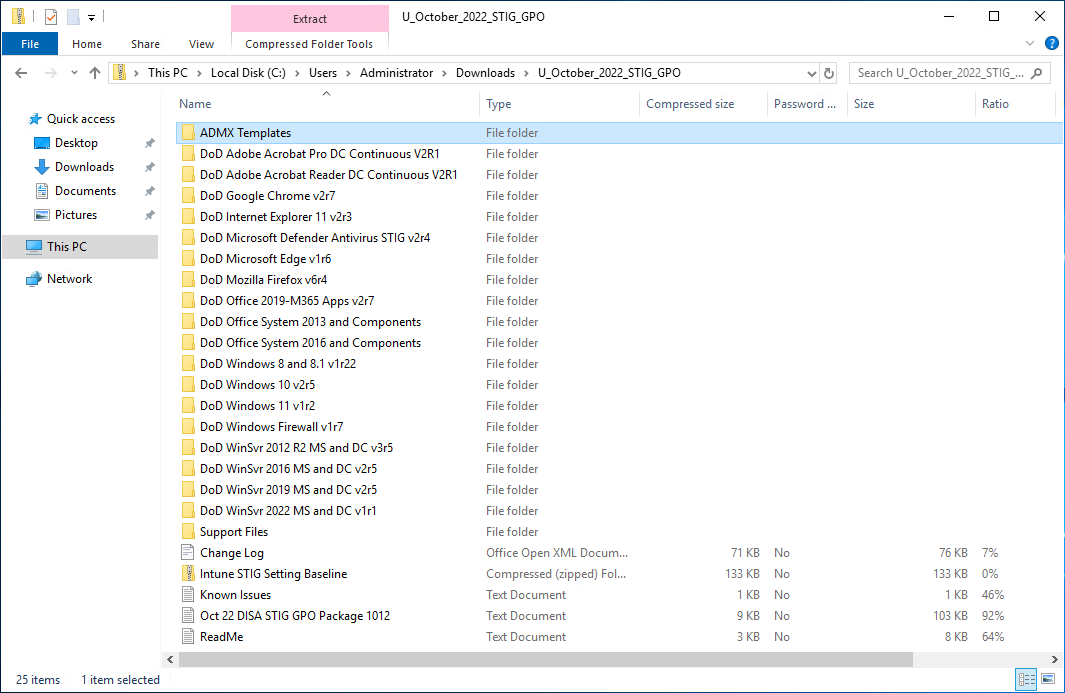
Later in this guide, GPO deployments will primarily be focused on the following:
- DoD WinSvr 2012
- DoD WinSvr 2016
- DoD WinSvr 2019
- DoD WinSvr 2022
- DoD Windows 10
- DoD Windows 11
Generally, each DoD* folder will contain the following folders:
Folder Name Folder Description GPOs The location of the GPOs that will be referenced to "import settings" via the Group Policy Management MMC. Reports HTML based GPO reports - useful for reviewing GPO configurations. WMI Filter The GPO's target specific Microsoft Windows operating systems, these filters are applied to the GPO to assist targeting the correct operating system.
Import the DoD STIGs GPO
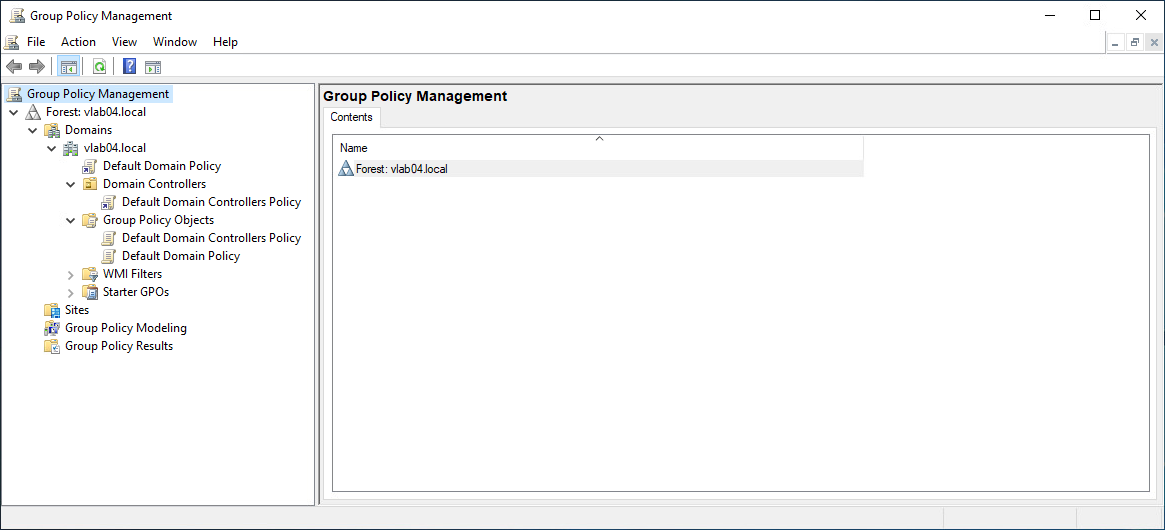
- Launch the Group Policy Management MMC.
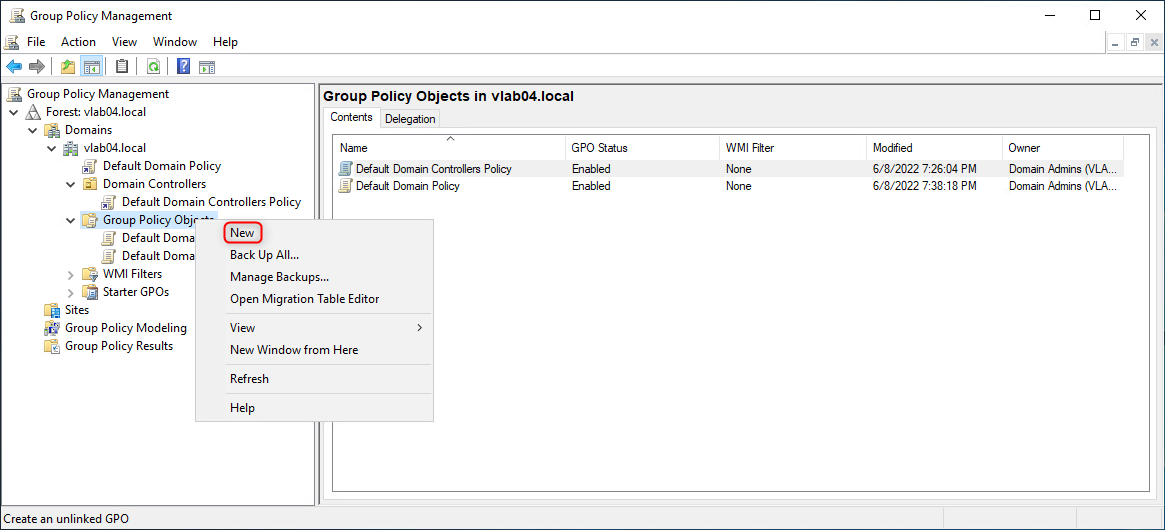
- Right-click "Group Policy Objects" and select "New" to create a new Group Policy Object.
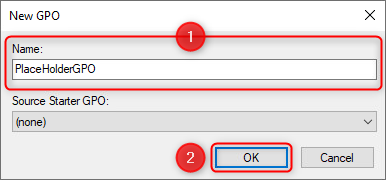
Name the object "PlaceHolderGPO".
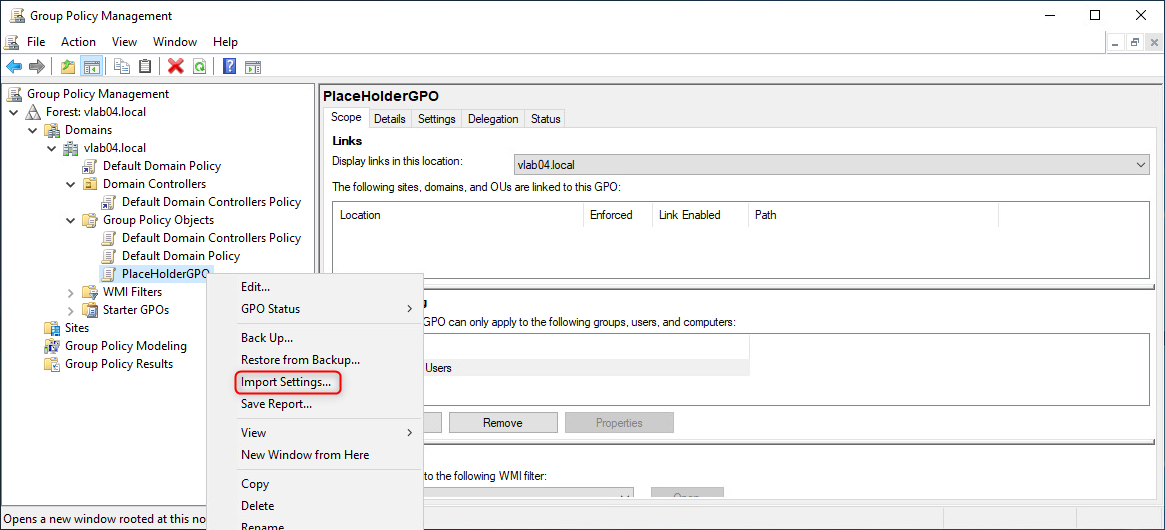
- Right-click on "PlaceHolderGPO" and select "Import Settings..." to launch the Import Settings Wizard.
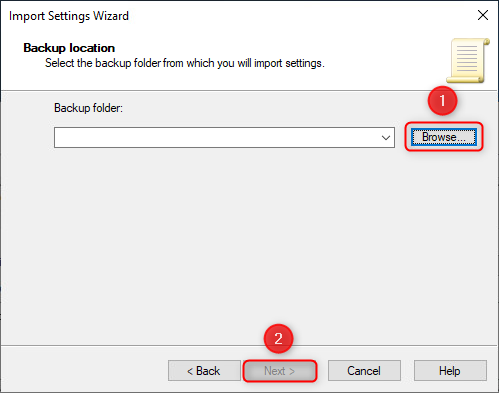
- In the Import Settings Wizard, click next until you arrive at the Backup location window. Browse to the location where the DoD STIGs GPOs were previously extracted and select the respective "GPOs" folder as the location. Afterwards, click "Next".
In this example, the following path was used for the DoD Windows 10 GPO :
C:\Users\Administrator\Downloads\U_October_2022_STIG_GPO\DoD Windows 10 v2r5\GPOs
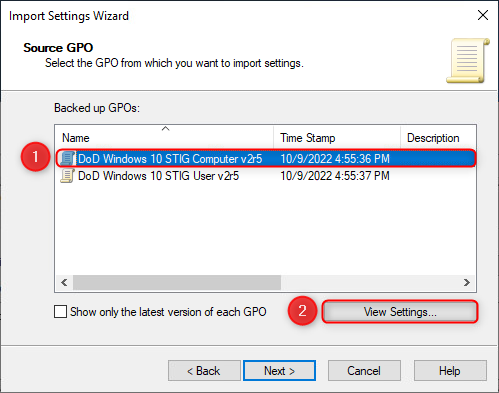
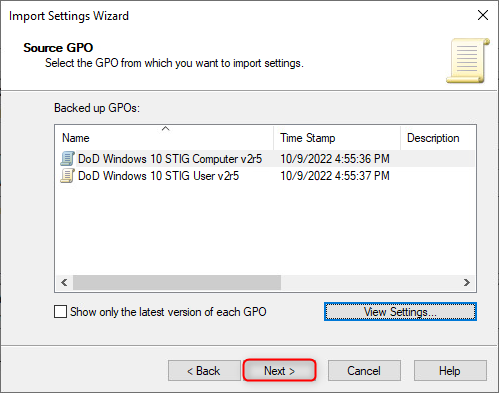
- In the Source GPO window, select one of the available GPO's. Afterwards, click "View Settings" to launch the default web browser containing the GPO configuration settings.
DoD STIGs splits GPO's between "Computer" and "User" based functions. In this example, we are only importing the "Computer" based GPO. However, keep in mind that User based GPO's are also required to satisfy DoD/NIST requirements, this means that these steps will need to be repeated to import the "User" based GPO as well.
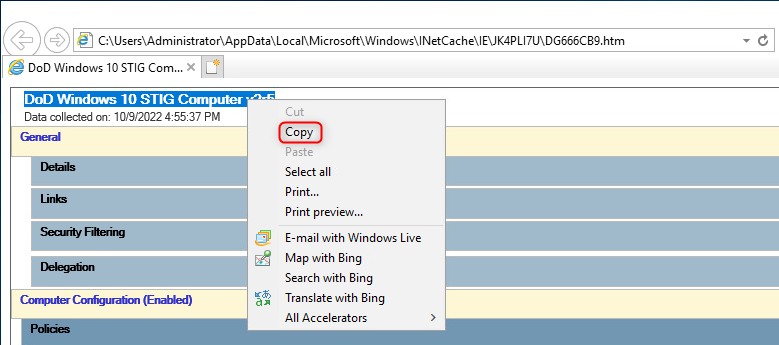
In the web browser window, highlight and copy the name of the GPO. The name of the GPO will be used later in this guide. Afterwards, close the browser window.
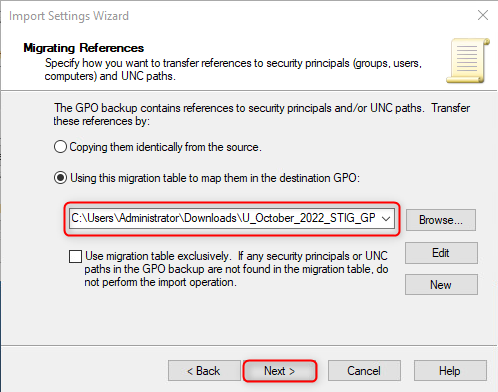
Click "Next" until you arrive at the Migrating References window.
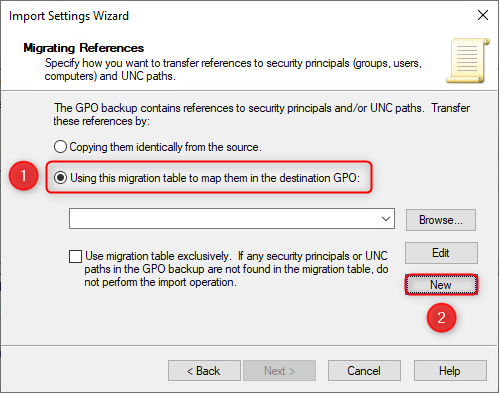
- In the Migrating References windows, select "Using this migration table to map them in the destination GPO". Afterwards, click "New". This will launch the Migration Table Editor.
In the Migration Table Editor, navigate to Tools ⮞ Populate from Backup. This will launch the Select Backup window.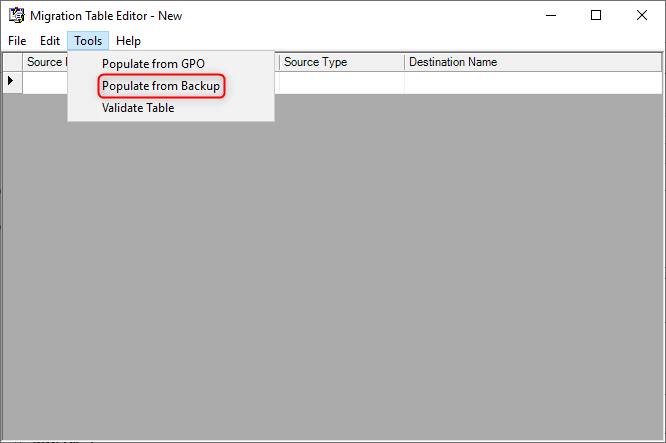
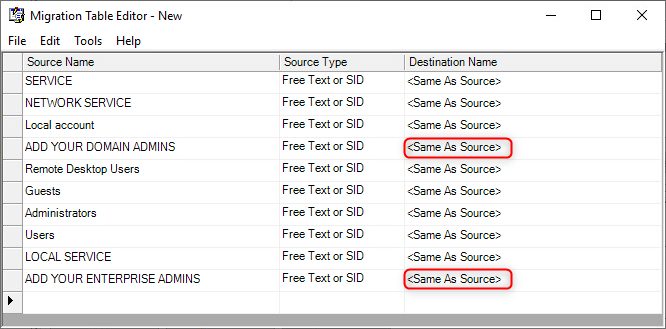
In the Select Backup window, select the same GPO that was previously selected at the Source GPO window and click "OK". This will populate the Migration Table Editor with property values forSource Name,Source Type, andDestination Name.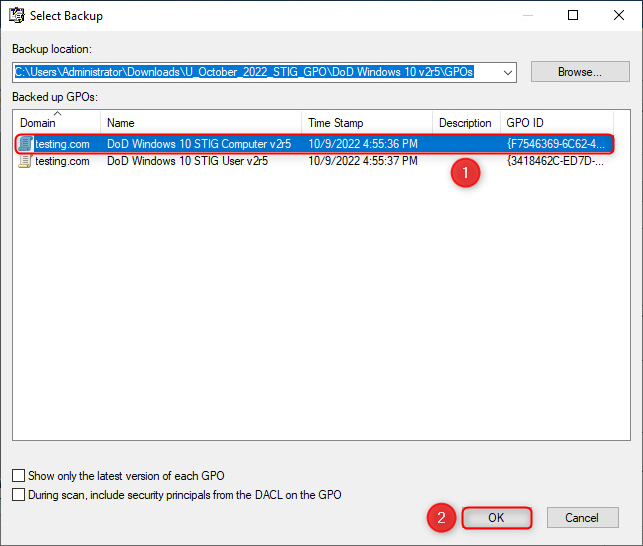
In the Migration Table Editor, the<Same As Source>Destination Name values need to be changed for Source Name:
"ADD YUR DOMAIN ADMINS"
"ADD YOUR ENTERPRISE ADMINS"
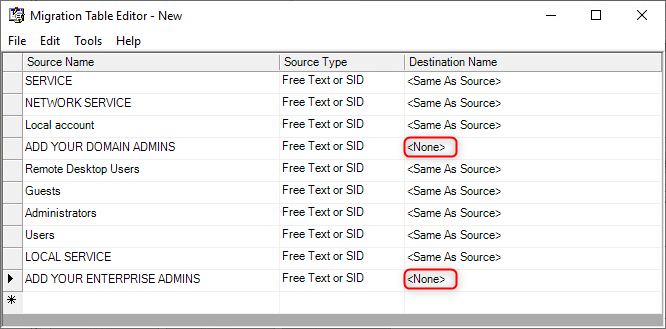
Right click on each of the respective Destination Name values and select Set Destination > No Destination.
Afterwards, the Destination Name values should look similar to the following screenshot:
In the Migration Table Editor, navigate to File ⮞ Save As and save the file to the GPOs folder for safe keeping - name the file after the corresponding GPO that was used - the same one selected at the Source GPO window.
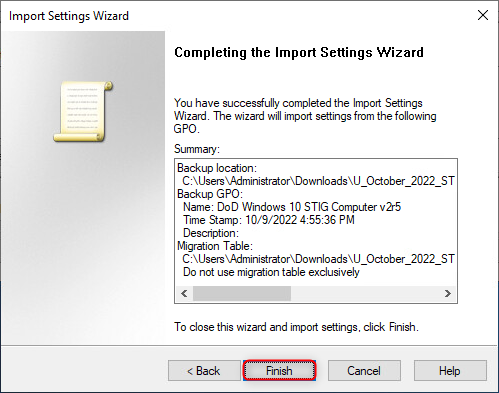
- Click "Finish". The Import window will appear.
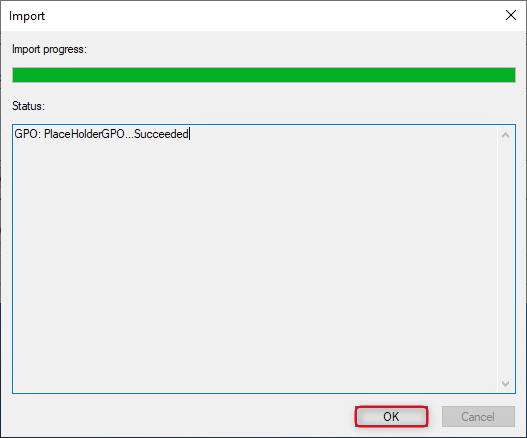
Click "OK".
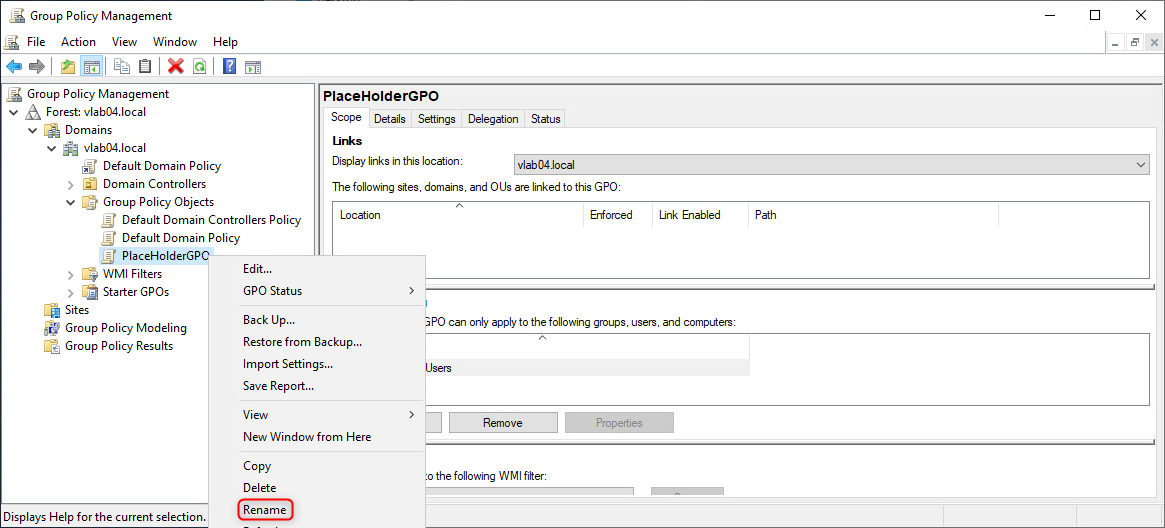
- In the Group Policy Management MMC, right click on the "PlaceHolderGPO" and select "Rename". Rename the GPO to the respective DoD STIGs GPO - the same one selected at the Source GPO window.
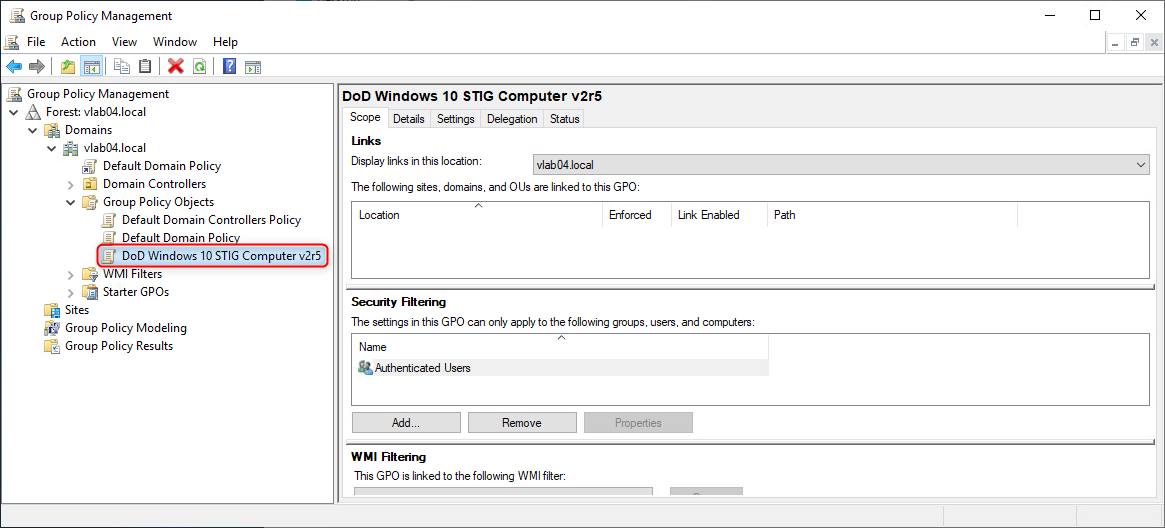
The final GPO "production" name should look similar to the following screenshot:
Import WMI Filter(s)
To make sure that each GPO associated with a group can only be applied to devices running the correct version of Windows, use the Group Policy Management MMC snap-in to create and assign WMI filters to the GPO. Although you can create a separate membership group for each GPO, you would then have to manage the memberships of the different groups. Instead, use only a single membership group, and let WMI filters automatically ensure the correct GPO is applied to each device.
- Open the Group Policy Management MMC snap-in.
- Right-click WMI-Filters, select "Import...".

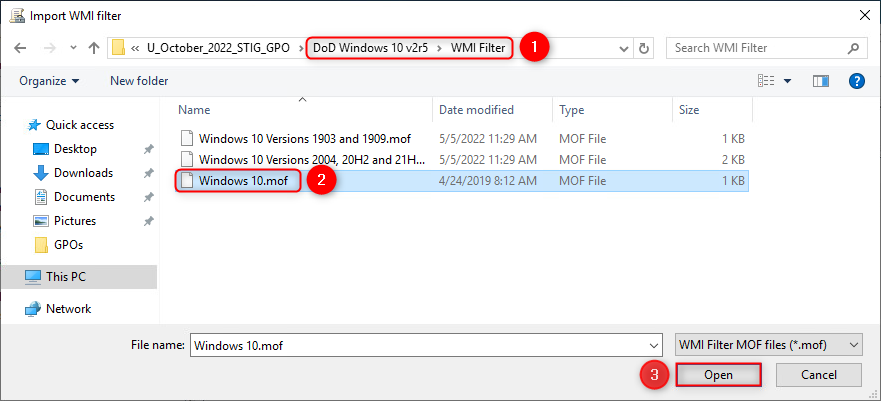
Navigate to the "WMI Filter" folder. This folder is located within the DoD STIGs GPO directory that corresponds to the correct Microsoft Windows version. Select the respective *.mof file and click "Open".
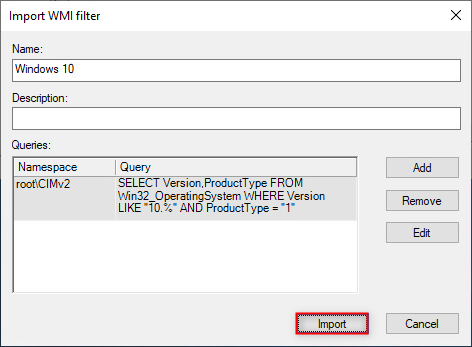
Use the default values and click "Import".
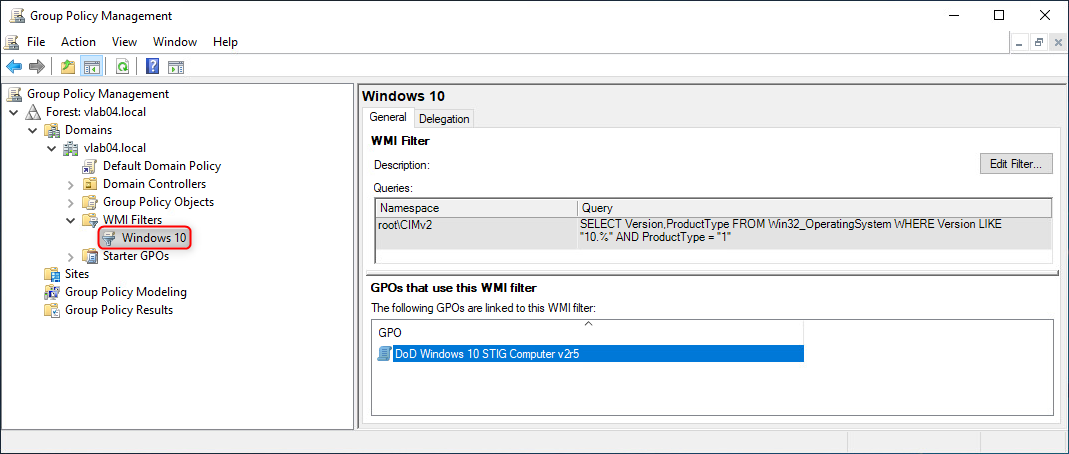
The WMI Filter should now be added.
Assign WMI Filter(s)
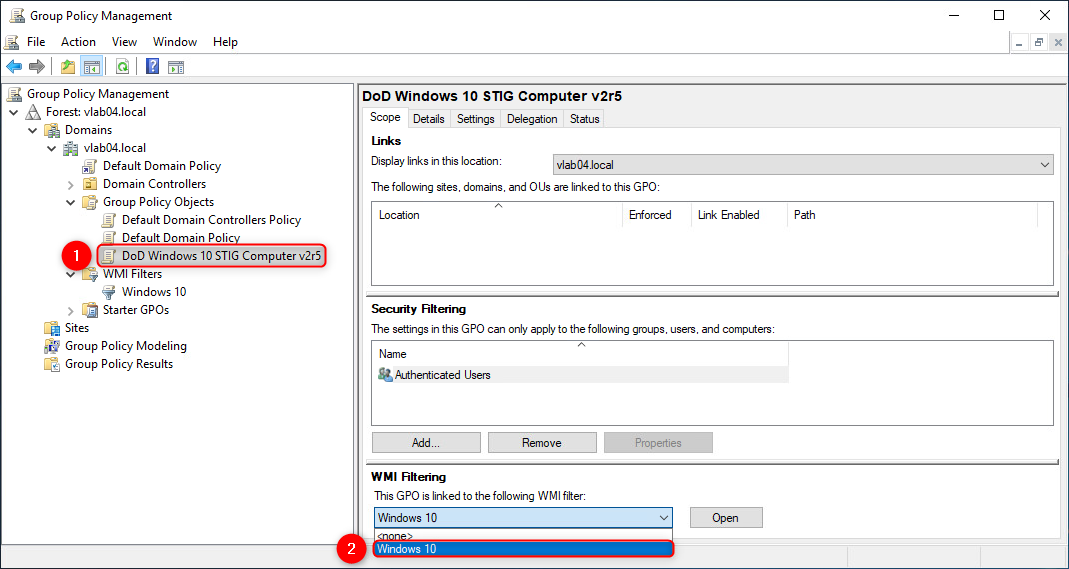
- Select the GPO to assign the filter. Afterwards, in the "WMI Filtering" section for the selected GPO, select the WMI filter from the dropdown option.
Sources
- N/A
KB Change/Issue Log
yyyy/mm/dd - Title
Issue
N/A
Solution
N/A
KB Meta
| Page Includes | @9#bkmrk-callout-danger-NoResponsibilityDisclaimer-5wod5ufe |

